Kubeshark Tutorial: Developer Track

Abstract
This blog post is a work in progress, offering detailed instructions on the installation, troubleshooting, and maximizing the value derived from Kubeshark.
It provides a hands-on introduction to Kubeshark, a tool that simplifies debugging and monitoring containerized applications in Kubernetes environments.
The guide is segmented into three focused tracks to cater to different user needs:
- Developer Track: Ideal for developers looking to deploy Kubeshark on development or test clusters (e.g., kind, minikube) for application testing.
- User Track: A guide that outlines how to leverage the core features of Kubeshark, suitable for users at any level.
- DevOps Track: Specifically designed for DevOps professionals tasked with deploying Kubeshark in organizational clusters.
This post is the first of three and focuses on the Developer Track. The other two tracks will follow shortly.
Objectives
- Gain hands-on experience deploying Kubeshark on a development cluster.
- Identify and resolve potential issues to enhance workflow efficiency.
Installing Prerequisites
Begin by installing a Kubernetes cluster. In this example, we'll be using Kind (Kubernetes in Docker), kubectl, and Kubeshark. The aim is to acquaint yourself with the operational environment of Kubeshark.
While its meant to work out-of-the-box, identifying and mitigating potential obstacles is essential for a smooth experience. Installation instructions for Mac are as follows:
> Explore more installation techniques and find comprehensive instructions in the Kubeshark Installation Guide.
For installations using Helm, refer to the DevOps Track (coming soon).
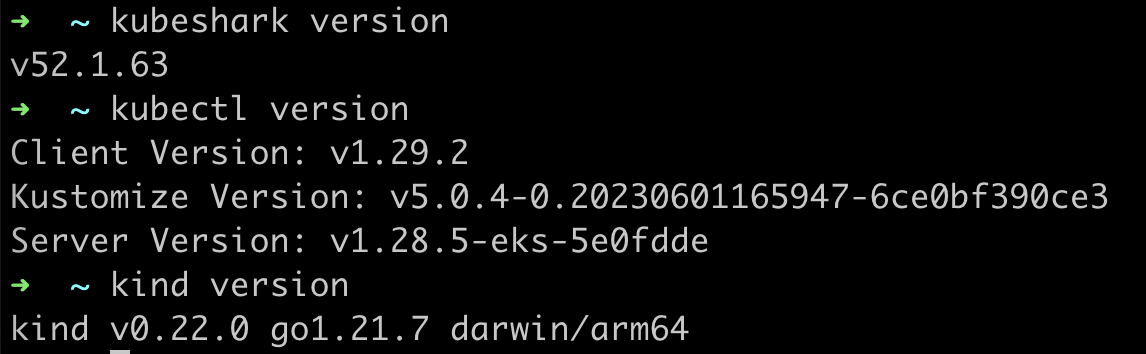
After installing all prerequisites, ensure they are correctly installed by following these steps:
The results should look like this:
Kind
Kind, short for "Kubernetes IN Docker," is an essential tool for developers, facilitating the creation of local Kubernetes clusters using Docker. It's particularly useful for development, testing, and CI/CD processes, allowing for rapid, resource-efficient Kubernetes experimentation on a personal machine. As a project endorsed by Kubernetes, Kind simplifies the complexities of Kubernetes application development and testing without necessitating a full cluster setup.
kubectl
kubectl stands as the cornerstone command-line utility for Kubernetes cluster management. It empowers users to deploy applications, manage cluster resources, and access logs through interactions with the cluster's API server. kubectl is indispensable for navigating the Kubernetes ecosystem, offering a broad spectrum of commands for comprehensive cluster administration.
Create a Kubernetes Cluster
To commence, create a local Kubernetes cluster with the following command:
Installing the Demo Application
Enhance your Kubeshark experience with a demo application, designed to generate traffic across various supported protocols. Use the following command to install the demo application.
While not mandatory, you can clone the full repo from here.
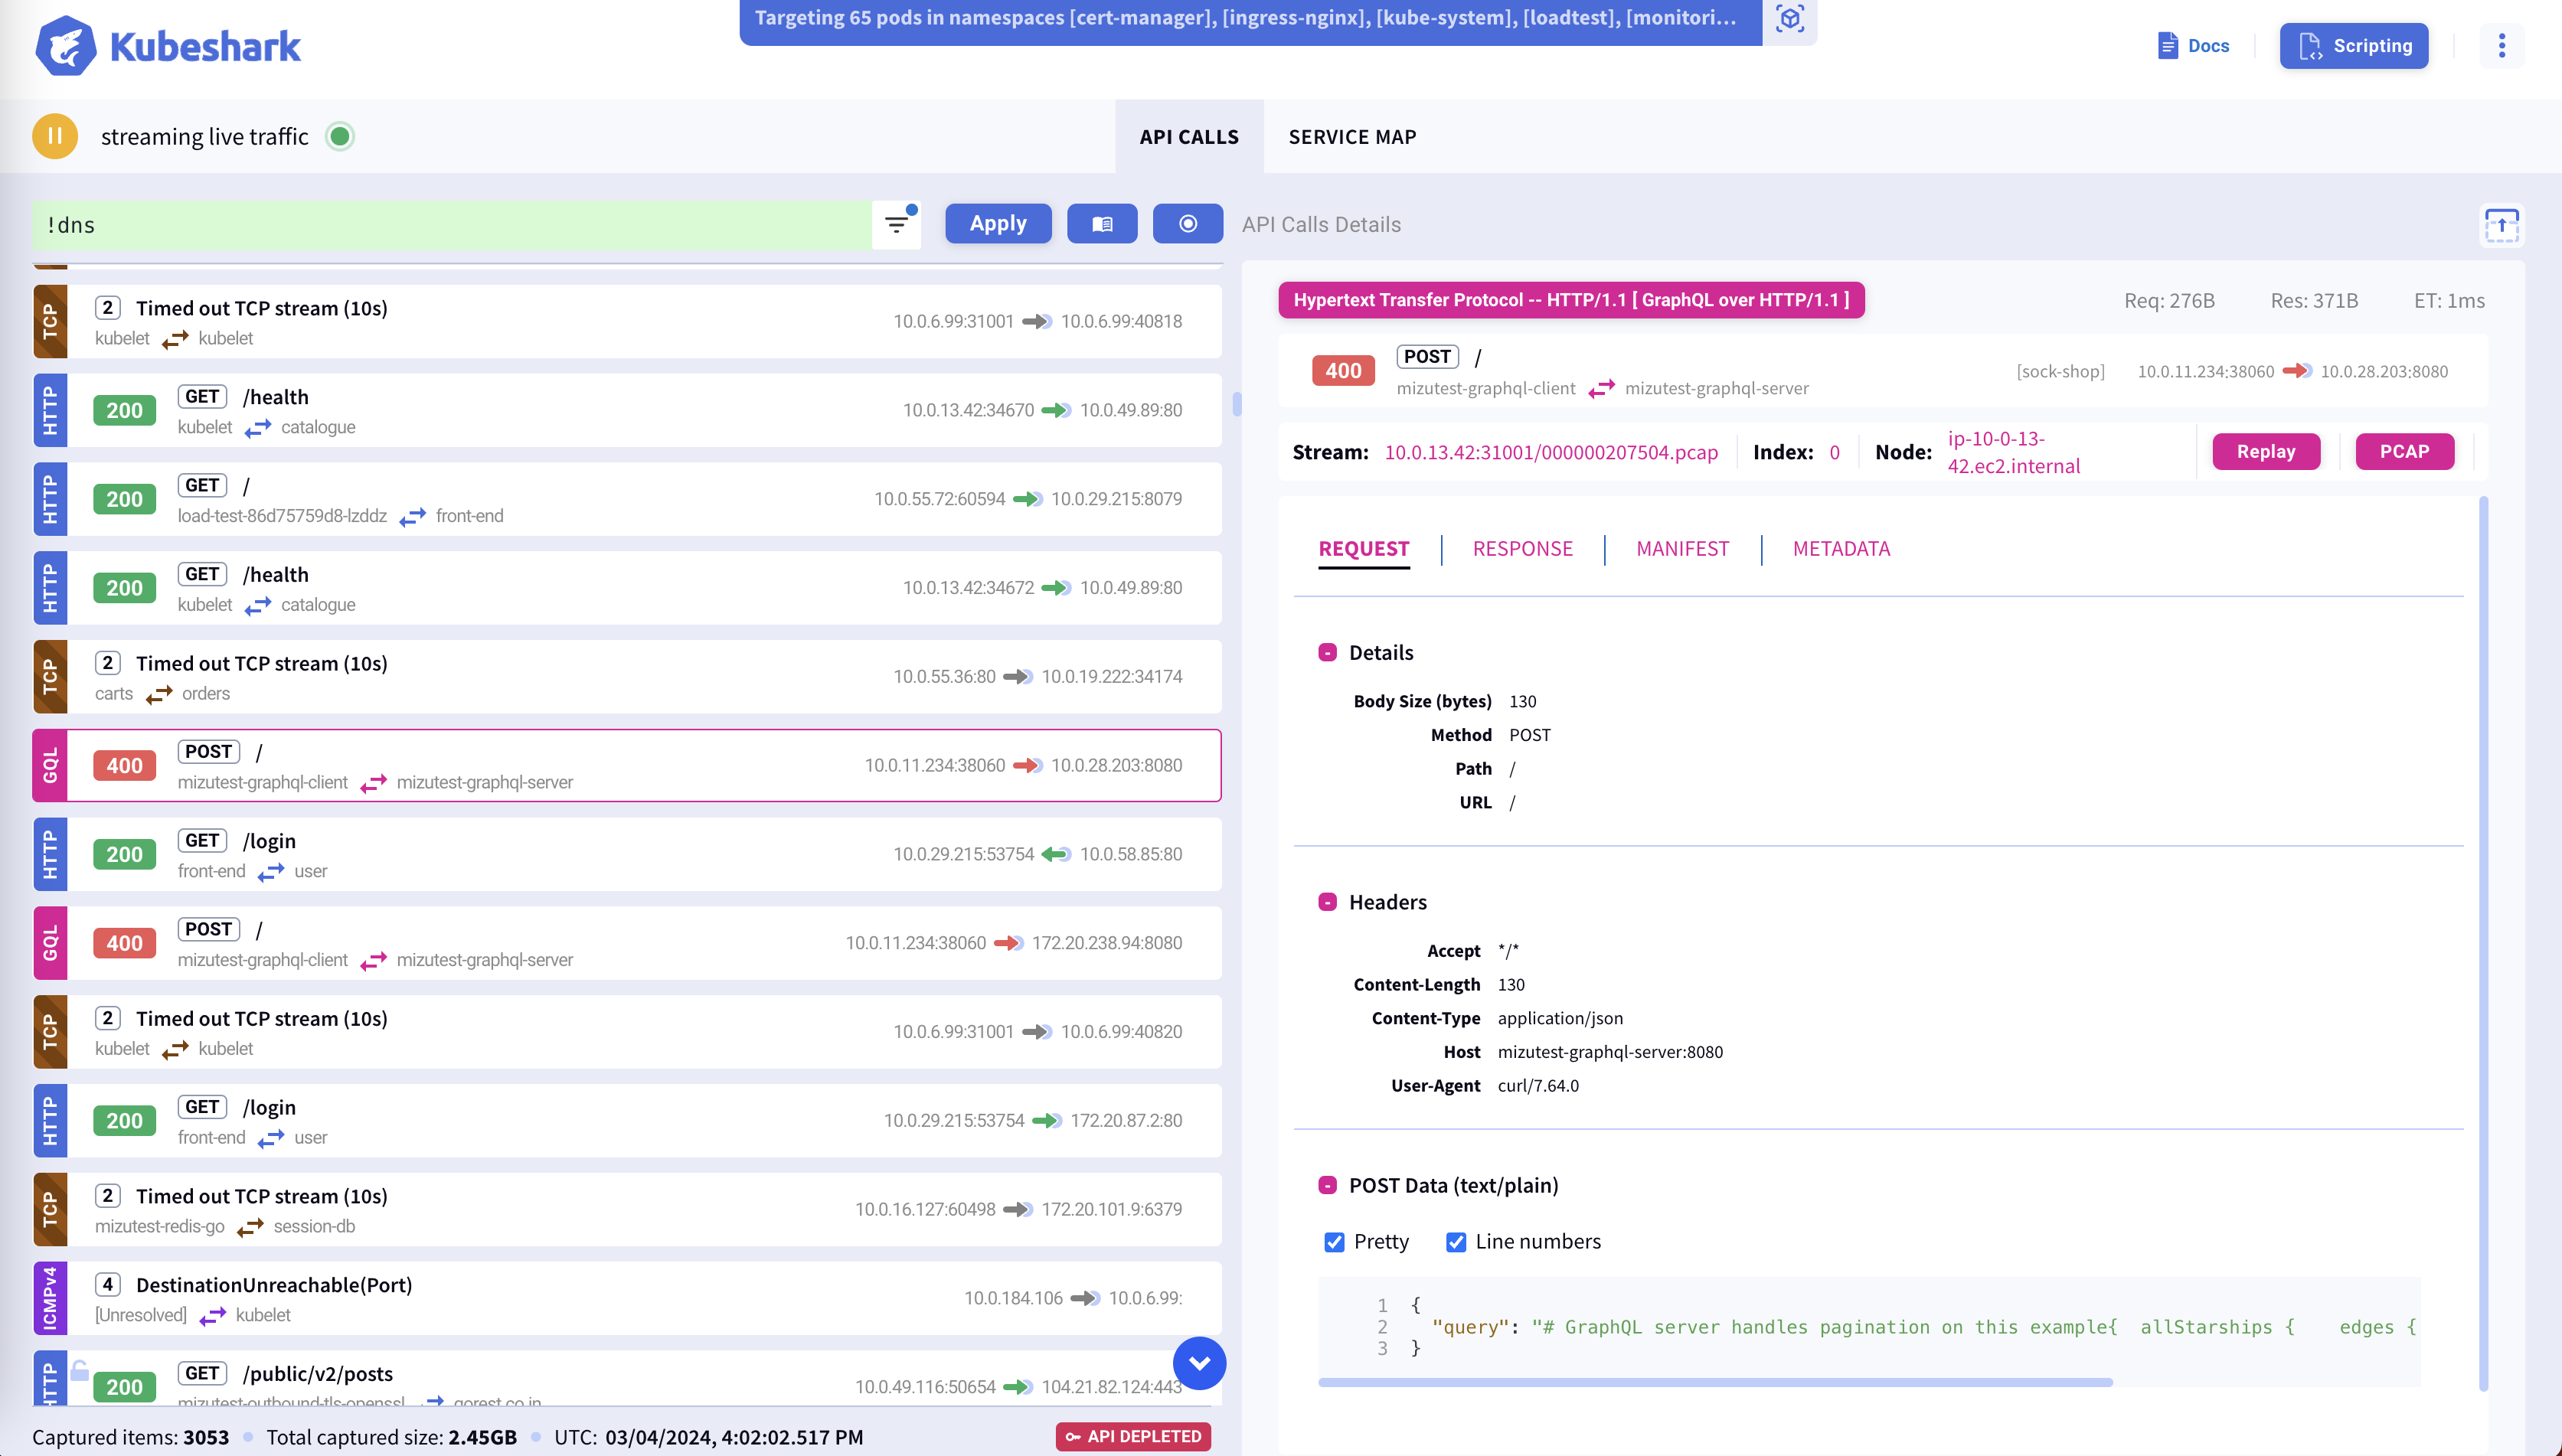
Run Kubeshark
Launch Kubeshark using the `tap` command to automatically open a browser window showcasing the Kubeshark dashboard:
Troubleshooting
Dashboard Doesn't Open
Should the dashboard fail to open, the most common culprit is an occupied default dashboard port, identifiable through CLI log messages.

Resolution involves either terminating the port-occupying application or opting for an alternate port.
No Traffic in the Dashboard
An empty dashboard signals a potential issue. Begin with an examination of the browser console log for errors. Absence of errors there necessitates a review of worker log files, as the problem may stem from worker connectivity issues, typically due to non-operational worker pods.
Developer Track Conclusion
Observing traffic on the dashboard signifies a successful completion of the Developer Track, paving the way to the User Track (comming soon).